How to Fix a Running Toilet and Save on Your Water Bill
There I was, sitting at my desk with my notebook, trying to focus on a complex automation script, when that persistent, rhythmic hissing sound started drilling into my brain. It was my bathroom, acting like a tiny, water-wasting leak in my otherwise optimized morning routine. Most people think a constant trickle means you need to call an expensive plumber and drain your bank account, but that’s a total myth. Usually, learning how to fix a running toilet is much more about understanding the simple mechanics of the tank than it is about heavy-duty construction. It’s just a small puzzle waiting to be solved, and honestly, it’s one of those little wins that makes your home feel way more efficient.
I’ve spent years breaking down complex systems, and I promise you, this isn’t as intimidating as it sounds. In this guide, I’m going to walk you through the exact, no-nonsense steps to identify the culprit—whether it’s a faulty flapper or a misaligned fill valve—and get it sorted. No fluff, no technical jargon that requires an engineering degree, just practical, step-by-step solutions to help you reclaim your peace of mind (and your water bill). Let’s get to work!
Table of Contents
- Step-by-Step Instructions
- Mastering Silent Toilet Leak Detection and Tank Components
- Simple Toilet Flapper Replacement and Flush Valve Troubleshooting
- Pro-Tips to Keep Your Bathroom Flowing Smoothly (and Save Your Water Bill!)
- Quick Wins for a Quieter, More Efficient Bathroom
- ## The Zen of Troubleshooting
- Putting the Pieces Together
- Frequently Asked Questions
Guide Overview
Tools & Supplies
- Adjustable wrench for tightening bolts
- Screwdriver for securing tank components
- Sponge or towel to soak up excess water
- Replacement flapper (1 unit)
- Replacement fill valve (1 unit)
- Replacement toilet tank repair kit (1 kit)
Step-by-Step Instructions
- 1. First things first, let’s clear the workspace. I always tell my clients that you can’t optimize a system if you’re working in chaos, so grab a towel and shut off the water supply by turning the valve located behind the toilet base clockwise. Once that’s closed, flush the toilet and hold the handle down to drain as much water as possible from the tank; this prevents any unexpected puddles while you’re working.
- 2. Now, let’s peek inside the “engine room.” Take a look at the flapper—that little rubber plug at the bottom of the tank—to see if it’s seated correctly. If it looks worn out or slimy, it’s likely not creating a watertight seal, which is the most common culprit for a running toilet. If it’s just misaligned, try adjusting the chain connecting the lever to the flapper to ensure there’s no tension pulling it upward.
- 3. If the flapper looks fine but the water is still trickling, it’s time to inspect the fill valve. This is the tall assembly on the left side of the tank that controls the incoming water. Check the float—the part that rises with the water—to see if it’s stuck or set too high. If the water level is reaching the top of the overflow tube, you’ll need to adjust the float screw to lower the water level so it stops spilling over.
- 4. Let’s get a little more hands-on with the hardware. If the float is adjusted but the tank still won’t stop filling, the fill valve itself might be the broken piece of the puzzle. I usually recommend replacing the entire valve assembly rather than trying to patch it; it’s a relatively inexpensive fix that saves so much mental energy in the long run. Just make sure to unplug any sensors if you have a smart toilet setup first!
- 5. Once you’ve swapped out a part or adjusted a setting, it’s time for the ultimate test. Slowly turn the water supply valve back on and watch the tank fill up. Keep a close eye on the water level to ensure it stops well below the top of the overflow tube. It’s like debugging a new line of code; you want to observe the behavior closely until you’re sure the loop has finally closed.
- 6. Finally, give the handle a few test flushes to make sure everything is working in harmony. If the tank refills quickly and stays silent, you’ve successfully optimized your plumbing! I always keep a small notebook handy for these little home wins, because there’s nothing quite as satisfying as fixing a system with your own two hands.
Mastering Silent Toilet Leak Detection and Tank Components
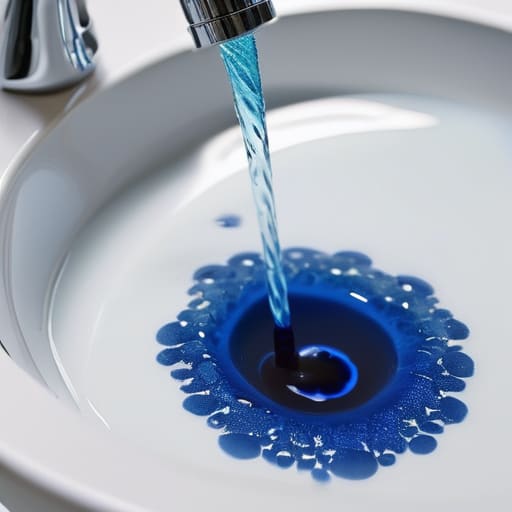
Sometimes, the most frustrating leaks are the ones you can’t even hear. It’s like a background app on your phone that’s draining your battery without you ever opening it; you just know something is wrong because the “system” feels off. To master silent toilet leak detection, I always recommend the old-school food coloring trick. Drop a few drops of dark dye into the tank and wait twenty minutes without flushing. If that color starts creeping into your toilet bowl, you’ve found your culprit. It’s a simple way to see if your seal is failing before it turns into a massive water bill headache.
Once you’ve identified the leak, it’s time to look under the hood at the various toilet tank components. Often, the issue isn’t a total breakdown but just a minor calibration error. For instance, a quick toilet fill valve adjustment can sometimes resolve a continuous run by ensuring the water stops at the right height. If the water level in the tank is set too high, it will constantly spill into the overflow tube, mimicking a leak. Think of it as fine-tuning your workflow—sometimes a tiny tweak is all it takes to get everything back in sync.
Simple Toilet Flapper Replacement and Flush Valve Troubleshooting
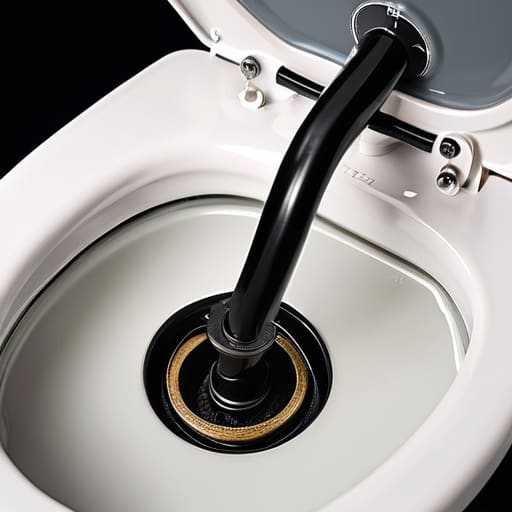
If you’ve realized the culprit is that rubber seal at the bottom of the tank, don’t panic—you’re actually halfway to a win. A toilet flapper replacement is one of those “low effort, high reward” DIY tasks that feels surprisingly satisfying once it’s done. When you’re swapping it out, take a quick peek at the chain connecting the lever to the flapper. If it’s too tight, it might hold the seal open; if it’s too long, it can get caught underneath. Think of it like a delicate piece of hardware—it needs just the right amount of slack to function perfectly.
While you’ve got the tank open, it’s the perfect time for some quick flush valve troubleshooting. Sometimes the issue isn’t the rubber itself, but how the valve seat is sitting. If the new flapper still isn’t stopping the flow, check for any mineral buildup or debris around the rim where the seal meets the porcelain. A quick wipe with a sponge can often clear that up. It’s all about fine-tuning the small details to ensure your system runs smoothly and silently.
Pro-Tips to Keep Your Bathroom Flowing Smoothly (and Save Your Water Bill!)
- Keep a “leak kit” in your utility drawer—having a spare flapper and some plumber’s grease on hand turns a potential weekend disaster into a quick five-minute fix.
- Don’t over-tighten those tank bolts; I learned the hard way that being too aggressive with a wrench can actually crack the porcelain, and that’s a much bigger puzzle to solve.
- Treat your toilet like a little ecosystem; if you notice the water level acting weird, check the fill valve adjustment screw first before you go buying expensive new parts.
- Use a drop of food coloring in the tank as a low-tech diagnostic tool—it’s a simple way to see if that “ghost flush” is actually a silent leak in the seal.
- Clean your tank regularly; sometimes a bit of mineral buildup is the only thing standing between you and a perfectly functioning flush, and a quick scrub can work wonders.
Quick Wins for a Quieter, More Efficient Bathroom
Think of your toilet as a tiny, closed system; most “mysterious” leaks are just a simple mismatch between the flapper and the flush valve that you can fix in minutes.
Don’t wait for a massive water bill to act—if you hear that constant, ghostly hiss, your tank is likely losing its battle with gravity, and a quick component check can save you a ton of stress (and money).
Treat maintenance like a DIY automation project: once you swap out those worn-out parts, you’ve essentially upgraded your home’s efficiency without needing a professional plumber.
## The Zen of Troubleshooting
“Think of a running toilet not as a plumbing disaster, but as a tiny, misaligned gear in your home’s ecosystem; once you stop seeing it as a nuisance and start seeing it as a simple puzzle to solve, the fix becomes surprisingly satisfying.”
Jordan Bennett
Putting the Pieces Together
At the end of the day, fixing a running toilet isn’t about being a master plumber; it’s about having the right sequence of steps to tackle the problem. We’ve looked at everything from the silent culprits of tank leaks to the hands-on process of swapping out a worn-out flapper or adjusting that finicky flush valve. By taking a moment to diagnose the source rather than just reacting to the sound of running water, you’ve likely saved yourself a hefty water bill and a lot of unnecessary stress. Remember, most of these issues boil down to a few small, replaceable components that just need a little bit of attention to get back into sync.
I know that staring into an open toilet tank can feel a bit overwhelming if you aren’t used to it, but I hope this process showed you that even the most annoying household glitches are just small puzzles waiting to be solved. There is something incredibly satisfying about taking a broken system and, with just a few tools and a little bit of patience, making it run smoothly once again. Don’t let these little technical hiccups derail your day or drain your energy. Take it one step at a time, trust your intuition, and keep optimizing your space—one small fix at a time!
Frequently Asked Questions
If I’ve replaced the flapper but the water is still running, could the problem be with the fill valve itself?
Ugh, the classic “one step forward, two steps back” scenario! I’ve definitely been there. If your new flapper isn’t doing the trick, your fill valve is likely the next culprit. Think of it like a leaky faucet in a complex system; if the valve can’t shut off the flow completely, the water just keeps cascading into the overflow tube. Let’s troubleshoot that valve next—it might just need a quick adjustment or a total replacement.
How can I tell if the constant running is actually a silent leak from the tank into the bowl rather than just a faulty valve?
Think of it like a tiny, invisible leak in a data stream—you can’t see the packets dropping, but you know the system is lagging. To catch a silent leak, grab some food coloring or even a bit of dark juice and drop it into the tank. Don’t flush! Wait about 15–20 minutes. If that color starts creeping into the toilet bowl, you’ve found your culprit: water is bypassing the seal and trickling through.
Is it worth trying to adjust the float height to stop the overflow, or should I just go ahead and replace the whole assembly?
Think of it like debugging a piece of code: always try the simplest patch before rewriting the whole script! If the water is spilling into the overflow tube, try adjusting the float height first. It’s a quick, five-minute fix that usually solves the problem. However, if the hardware looks corroded or feels “crunchy” when you touch it, don’t waste your energy. In that case, just swap the assembly—it’ll save you more headache in the long run.