How to Build a Workbench for Your Garage
I was standing in my garage last Saturday, staring at a pile of mismatched scrap wood and a half-finished project, feeling that familiar, frantic itch of unorganized chaos. My brain was spinning with all the things I needed to fix, but I couldn’t even find a flat surface to set my coffee down, let alone start working. It hit me then: you can’t optimize your output if your physical environment is a disorganized mess. Most people think you need a professional-grade workshop or a massive budget to get started, but the truth about how to build a workbench is actually much simpler. It’s not about the most expensive tools; it’s about creating a stable foundation that actually works for the way you move and create.
In this guide, I’m stripping away the fluff and the overly complicated blueprints that usually make DIY projects feel like a second job. I’ll walk you through a straightforward, step-by-step approach to how to build a workbench that is sturdy, functional, and—most importantly—tailored to your specific space. We’re going to focus on smart, efficient design choices that will turn your cluttered corner into a high-performance zone where you can actually get things done. Let’s stop fighting your workspace and start building something that supports your flow.
Table of Contents
- Step-by-Step Instructions
- Choosing Smart Woodworking Workbench Plans for Success
- Designing a Heavy Duty Workbench Design for Longevity
- Pro-Tips for a Workspace That Actually Works for You
- Quick Wins for Your New Workspace
- ## The Heart of the Workspace
- Your New Command Center Awaits
- Frequently Asked Questions
Guide Overview
Tools & Supplies
- Circular saw or miter saw for cutting lumber
- Power drill for driving screws
- Tape measure for accurate dimensions
- Speed square for ensuring 90-degree angles
- 2×4 lumber (8-10 boards)
- 4×4 lumber (2 posts)
- 3/4 inch plywood (1 sheet)
- 2.5 inch wood screws (1 box)
Step-by-Step Instructions
- 1. First things first, we need to tackle the blueprinting phase. Grab that notebook I’m always carrying and sketch out a rough layout of what you actually need—don’t just copy a random design from Pinterest without thinking about your specific space. Think about the ergonomics of your workflow; if you’re too low to the ground, you’ll be feeling it in your lower back by the end of the afternoon. Once you have your dimensions, make a precise shopping list so you aren’t making three frantic trips to the hardware store halfway through the build.
- 2. Now, let’s talk about the bones of your project: the lumber. I usually recommend a mix of sturdy 2x4s for the frame and a thick piece of plywood or even a solid butcher block for the top. When you’re at the lumber yard, take a second to inspect every single board for bows or twists. A workbench is only as stable as its foundation, and trying to build on a warped piece of wood is like trying to run a complex software program on a glitchy, outdated OS—it’s just going to cause headaches later.
- 3. Time to get the frame together. Start by assembling your base using wood screws and a drill, ensuring every corner is perfectly square. I like to use a speed square here because precision is your best friend when you’re building something meant to hold heavy weight. If your frame is even slightly off, your tabletop is going to wobble, and there is nothing more frustrating than a workspace that feels like it’s dancing while you’re trying to work.
- 4. Once your frame is rock solid, it’s time to attach the tabletop. This is the “interface” of your workbench, so treat it with care! I find that using pocket hole joinery or heavy-duty L-brackets helps keep the top flush against the frame without any awkward gaps. If you’re using plywood, consider laminating two sheets together to create a heavier, more durable surface that can handle the occasional dropped tool or heavy project.
- 5. Next, let’s add some organizational “plugins” to your build. A workbench without storage is just a flat surface, and we want to optimize this space! I love mounting a pegboard to the back or adding a few shallow drawers to the underside of the frame. Think of this as optimizing your desktop shortcuts; you want your most-used tools within arm’s reach so you don’t break your flow every time you need a screwdriver.
- 6. The final step is the “user testing” phase, which I like to call the finishing touches. Sand down every edge and corner until they are smooth to the touch—nobody wants a splinter mid-project. Finally, apply a simple sealant or a coat of polyurethane to protect the wood from spills and scratches. It might feel like an extra step, but it’s the best way to future-proof your hard work so it stays looking great for years to come.
Choosing Smart Woodworking Workbench Plans for Success
Choosing Smart Woodworking Workbench Plans for Success
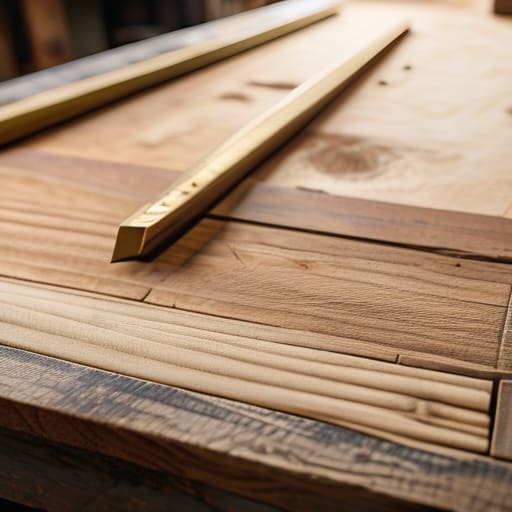
When I first started diving into DIY projects, I made the classic mistake of picking a plan that looked “cool” on Pinterest without actually thinking about my space or my workflow. It was like trying to install a high-end software suite on an old, glitchy laptop—it just didn’t sync up. Before you commit to a set of woodworking workbench plans, take a second to audit your actual needs. Are you planning on doing heavy sanding, or is this mostly for light assembly? If you’re planning to tackle big, messy projects, you’ll want to look for a heavy duty workbench design that won’t wobble every time you apply pressure.
Think of your plans as the blueprint for your personal productivity hub. You don’t just want a flat surface; you want a system. I always suggest looking for designs that incorporate built-in workshop organization solutions right from the start. It is much easier to build a station that has a dedicated home for your clamps and drills than it is to try and retrofit a cluttered mess later. Finding that perfect balance between a stable surface and smart storage integration is the real secret to a workspace that actually helps you thrive.
Designing a Heavy Duty Workbench Design for Longevity
When you’re moving from a casual hobbyist to someone who really wants to sink their teeth into projects, you have to think about the long game. A flimsy table might work for a quick afternoon task, but if you’re serious about building a sturdy work table, you need to prioritize mass and stability. I always tell my clients to think of their workbench as the foundation of their entire creative process. If the surface wobbles when you’re sawing or planing, it’s not just annoying—it’s actually going to throw off your precision. To avoid this, I recommend opting for a thicker top, perhaps using laminated layers of plywood or solid hardwood, to ensure your center of gravity stays exactly where it belongs: firmly on the ground.
Another thing I’ve learned from my years of tinkering is that a heavy-duty design isn’t just about weight; it’s about how you integrate your workflow. While you’re sketching out your heavy duty workbench design, start thinking about your future self. Where will your most-used clamps live? How much space do you need for your current kit versus what you’ll buy next year? By building in some intentional workshop organization solutions right from the start, you prevent that dreaded “where did I put my mallet?” moment that kills your momentum.
Pro-Tips for a Workspace That Actually Works for You
- Think about your “workflow footprint.” Before you drive a single screw, visualize where your tools will live and how much room you need to move around. A workbench isn’t just a table; it’s the cockpit of your projects, so make sure the controls are exactly where your hands naturally land.
- Don’t skimp on the legs. I’ve seen so many beautiful builds fail because the base was too spindly, leading to that annoying, shaky wobble when you’re sawing. If your bench moves while you’re working, you’ll end up fighting the furniture instead of the project.
- Integrate your power early. One of my favorite DIY automation hacks is building cable management or even mounting a power strip directly to the side of the bench. It saves you from that “spaghetti mess” of cords trailing across the floor and tripping you up mid-task.
- Level it out, then level it again. Even if your garage floor looks flat, it probably isn’t. Using adjustable feet or shims to ensure your bench is perfectly level will save you massive headaches when you’re trying to do precision work or assembly.
- Leave room for the “messy middle.” We often design for the perfect, clean project, but real life is dusty and cluttered. Build in some extra space—maybe a small shelf underneath or a dedicated tray—to hold your current “work in progress” so you don’t have to tear everything down every time you take a break.
Quick Wins for Your New Workspace
Don’t overcomplicate the design; focus on a sturdy, level surface that matches the specific scale of the projects you actually plan to tackle.
Invest in high-quality, heavy-duty materials from the start to save yourself the headache of rebuilding a wobbly bench in six months.
Think of your workbench as a living system—build it with enough flexibility and smart organization in mind so it can evolve alongside your growing skills.
## The Heart of the Workspace
“Think of your workbench not just as a slab of wood and a frame of screws, but as the physical operating system for your creativity; if the foundation is glitchy, the whole project crashes.”
Jordan Bennett
Your New Command Center Awaits
At the end of the day, building a workbench isn’t just about stacking lumber or driving screws into a frame; it’s about creating a dedicated space where your ideas can actually take shape. We’ve walked through the importance of selecting the right plans, prioritizing a heavy-duty design that won’t wobble when you’re working hard, and ensuring your setup is tailored to your specific workflow. By focusing on these foundational elements, you aren’t just making a table—you are building a reliable anchor for your creativity. Remember, a well-constructed workspace is the ultimate productivity hack, turning a chaotic corner of your garage into a streamlined engine for making things.
I know that staring at a pile of raw materials can feel a little daunting, much like starting a complex new software build, but I promise the payoff is worth every bit of the effort. Once that first project is clamped down onto your new surface, you’ll realize that this workbench is more than just wood and hardware; it is a testament to your own resourcefulness. Don’t worry about making it look like a professional showroom right away—just focus on making it work for you. So, grab your tools, clear some space, and start piecing your puzzle together. You’ve got this, and I can’t wait to see what you create next.
Frequently Asked Questions
What’s the best way to choose between a solid wood top and a plywood top if I'm on a tight budget?
If you’re watching every penny, go with plywood. It’s the ultimate “hack” for a budget build—sturdy, predictable, and way easier on your wallet. To make it feel less like a construction site and more like a real workspace, just glue two layers together for extra thickness. Solid wood is gorgeous and feels amazing, but it’s a heavy investment. For a first project, plywood gets you the functionality without the “oops, I overspent” regret!
How much space should I actually leave around my workbench so I'm not tripping over my own feet while I work?
Think of your workbench like a workstation in a busy office—you need “buffer zones” to actually function. I always recommend at least 36 inches of clear space on all sides. If you’re a bit more mobile or plan on using large tools, aim for 48 inches. You don’t want to be playing a high-stakes game of “don’t trip over the power cord” every time you need to step back and admire your progress!
Do I really need a specialized vise right away, or can I start with something simpler and upgrade later?
Honestly? Don’t sweat the high-end gear just yet. Think of it like upgrading your phone—you don’t need the latest flagship model to make calls and send texts. Start with a simple, sturdy screw vise or even some heavy-duty clamps. They’ll get the job done while you’re finding your rhythm. Once you start tackling more intricate projects and realize exactly what your workflow lacks, that’s when you invest in the “dream” setup.